Thursday 10 March 2011

Last editions to final Poster design...

GRID STRUCTURE... 


The grid that I've used to arrange my poster is 4x4. It is arranged so that the '100 years of GF Smith Paper' type is in the top half, and then the 'Design Museum' and '1-31 July 2011' type is in the 3rd quarter down.

I have also tried to line up the other letters in the type, but as I cut them out before thinking about the grid, it's hard to move them using Photoshop. But luckily it's all very close anyway.


Then I lined the Design Museum logo up so that it starts on the line.. and sort of lines up with the first '1' in '2011'. I also, with help from a tutor, changed the colouring of the type 'Design Museum'. The pure white before was a bit intrusive, a bit too sharp for the keeping of the rest of the poster. So what we did was take the colour of the whiteness at the top of the poster- the lighter end of it- and used it to colour the text. 
This looks so much better, as it's duller, but fits in a lot better with the hole design of the poster.


So this is my FINAL FINAL FINAL design.. Which I'm getting printed! 

Wednesday 9 March 2011

My Globe ... DONE.

The completion of my sculpture..


Starting shape... 


First few bits attached.. the easy part. 


You can see it's starting to get rounded off.. 


To try it out, I just stuck it together using masking tape, so that I could take it apart again. This was making sure that it fitted together properly.. which it KIND OF does..  

Then I took it apart again to cut the slits for the trees, and put it together again, neater, and using clear cello tape where needed.


I made incisions in this one area, so that I could slot the trees in while it was still open at the top.


This is how the trees went it.. This worked just as well as I thought it would.


This, obviously, is what it looks like half completed.. Although it's not finished I actually quite like how it looks at this stage.. 

However also at this stage.. I realise it is EXTREMELY hard to attach the last few bits, as it's inside the globe! Where my fingers can not reach! It's really difficult, but I made some extra tabs to attach, to see if it was easier... 


This did work for most of it.. Also a lot of it looked neater, especially without all the bits of cello tape holding it together. I just used PVA glue to stick the tabs. 


For the last bit, where I physically could not stick the tab on the inside to hold it.. I ended up just glueing part of the shape down, overlapping onto the other shape. Although you can tell it overlaps a bit, it looks much better than it did before overall! 

Now it's COMPLETE.. Time to photograph...


TA DAAA! Here is my final piece. 
I photographed it with my hand holding it to show the scale of it. 


The lighting is not perfect, but you get the idea. 


Looking down from the top.. I quite like this view, the trees look a bit like antlers on a deer or something!

The photos above have been photographed before I decided to glue tabs on.. So you cant tell it is still a bit straight edged. Once it'd been glued.. it looked like this: 


So I photographed it a bit, but I feel like I'm struggling to get a descent photo of it, as I feel it is still a bit messy really.. 


I do however think that the shape of the globe is better now that it's been glued. 


Over and out. PEACE. 

More Editing and Designs...

I have been through all my photos about a million times now, and each time I find another photo that I think I could use.. 


I have decided that this is one of my favourites, as not only does the text look brilliant and extremely defined, but with the posters around it makes it look like another poster among others.. like flyers plastered all over walls...


.. Just like this. As this poster really is an advert for the exhibition, I can imagine it up on a wall surrounded by other posters advertising other things.


I didn't think that this image needed any editing really, so I just added the 'Design Museum' logo, and placed it against the white so that it would be more visible. Although I think it doesn't look right there at all, it's too high up from the bottom, but if I lower it, you can not read it as well because the background is darker and busier with the different colours ect...


So I changed this one to white as well, and then I could move it lower. I tried to line it up with the last '1' of '2011' so it would have some structure to it. So this is DESIGN NUMBER TWO completed. I really like this one too...

HOWEVER .. If I wanted to have it with other posters around it, I should arrange it/set it up so that they were in line with it, as with this photo you can tell it is just stuck randomly on top of the posters that I have on my wall already. I think it's a REALLY good idea though!


This is another of my favourites... I really like how the angle shows the 3 different ways the type is seen. You can see the cut out, the standing up and then the shadow that the letters create. I love it. I also think that I managed to get the composition pretty spot on in this photo, and also there are no awkward edges to get rid of.. It's just the light that needs editing.


... So like before, I started with increasing the brightness to 70, and leaving the contrast as it is. Also like before, you can start to see the difference straight away.


Then I also changed the levels, as I did in the first design. I changed the input level to 1.54, and the output level to 60. Once again, the same as the first design, you can see that this has made the image much more white and lighter. This is so much better than the original photo.
Now all that is left is to add the design museum logo as well...


Last but not least.. DESIGN NUMBER THREE complete. Now my plan is to double check with a tutor before getting it printed!

The Editing of...

So now the photographs have been taken, it's time to get on Photoshop and start editing! 
Firstly I thought I would just quickly try out some of the other layout designs that I had drawn out in my sketchbook ..


So I Photoshop just to see what they would like:


Obviously if I was to use this, I would edit the photograph to make it look a lot better, as you can see the lighting is not quite right, and also an edge is visible. However I do quite like how the image goes all the way to both side edges, this could work nicely if the photo was better? Although, the main text isn't very clear really...


This was the other idea of cutting up the images and placing them differently. I think this one looked better in my head than it does like this.. of course in this small print screen you can not read the type very well, but also I feel like the shapes have nothing to do with this project and are a bit random to be honest. It is a bit different though, good to think of different compositions too.


I am also considering using a combination of the photographed cut out type, and digital type put on using Photoshop. My first feelings about this design is that its too simple, not in a good way. Also I think it looks like the front page of a crappy leaflet that you find in waiting rooms or something. I do not like this one at all. I think I'm not keen on the mixture of my type and the digital, I think I need to stick to my paper text only.

Still doing research...


I came across this poster on Richard Sweeney's blog, and I thought, what a great example of how a paper sculpture can be used to create a poster. The designer of this poster has chosen to use the logo of the studios in the bottom corner of this poster. Also it looks like the designer has used a grid to arrange the digital type, putting it all in the bottom third maybe? Although this poster is very simply done, I'm sure the designer did everything with a plan in mind.


I chose to try out this one first, as I think the text looks really good in this photo. It's quite bold and defined, especially the '100 years of GF Smith..' bit, which I think is quite important.


First thing I did was change the brightness, up to 66, as I want to get the image looking more white, like the paper actually is...


Then I tried playing with the levels.. Which I ended up changing both input and output levels, which also gets it looking a lot more white. Output level is now 60, and the input level is 1.44. I think it looks so much better already!


I did also try out changing the curves, to output 62 and input 54. This didn't really change that much that noticeably, but it did make it slightly more lighter and whiter as well.


I accidently clicked on invert at one point, and this is what it looked like! Very blue, and a little bit spooky! I would never use this for my poster, but I still think it looks pretty cool!

I have made the decision that I want to put the logo of the design museum, instead of the GF Smith logo, in the bottom corner on my poster...


 So I just downloaded the logo from google images...


...and opened it in Photoshop... Using the magic eraser I deleted the white back ground of the image so I was left with just the letters. After then copying it onto my poster design I thought the black looked far too dark and didn't quite fit in with the style of the image. So I turned it white instead! And it looks a lot better:


This is DESIGN NUMBER ONE completed. I am happy with this one as I think the type is nice and legible, also the layout makes a good composition.

The Making Of...

Getting on with the poster for task two.. I have chosen my font, and the size. I am going to use Britannic Bold, size 100, to link in nicely with the 100 years of GF Smith! So I started by printing out my text, and tracing it out onto the A2 sheet of white card I had bought specially ... 


Once I had drawn it all out in place, I had the horrible task of cutting out all the letters, as neatly as possible! Without cutting it out completely!


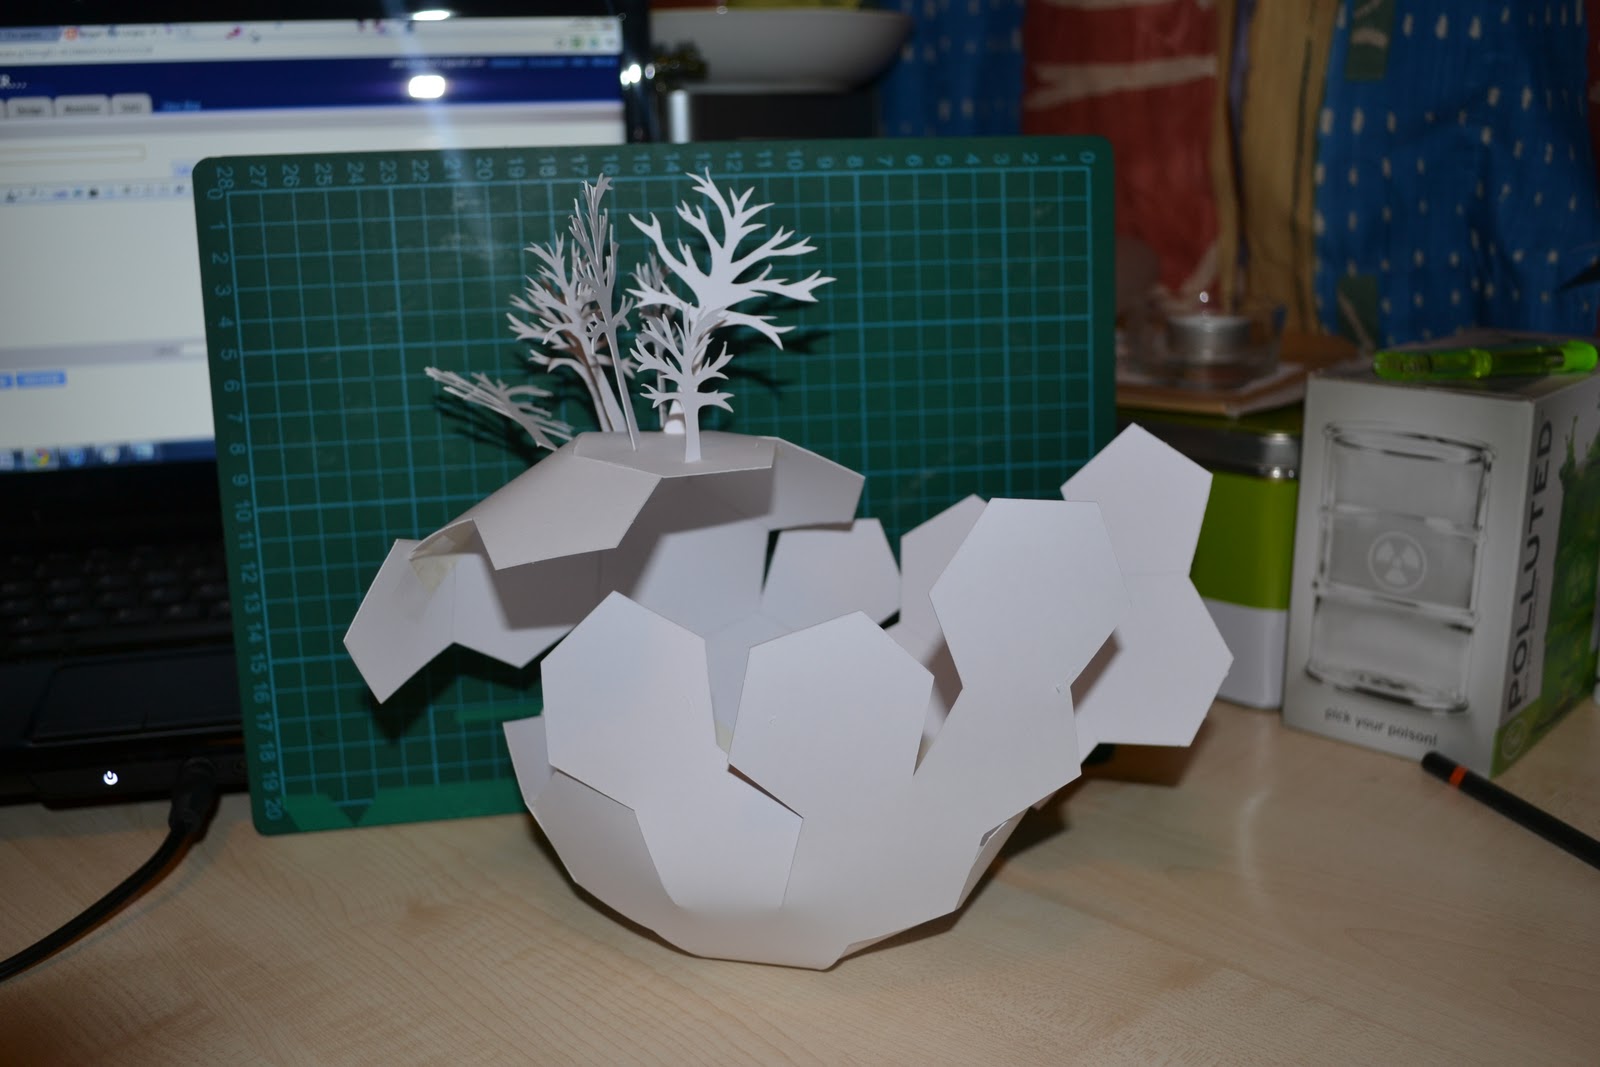
Mostly it went well, and it was very exciting as I started to fold all the letters one by one, up out of the paper! I could see my idea coming together right in front of me!


Although... I did make ONE mistake!! I knew it would happen. I had a momentary lapse of concentration.. resulting in the 'D' from design being cut out completely. OOPS. 
Not to worry though, I doctored it and used another small bit of card to attach it back where it should be. I don't think you can tell on the photographs.. so all is well! 

Next task.. GETTING A GOOD PHOTO OF IT! 


Firstly, I just tried photographing it on my desk, with white paper underneath and up the back, trying to cut out any edges, to make editing easier.. It's quite tricky to photograph this with all of it in focus. 

Maybe I should of put the more important information at the front, so it would look larger when the photo was taken. Or even done the '100 years of GF Smith paper' in a larger font, so it stood up taller than the rest of the text. 


Then I tried changing the lighting to see if it would make the text clearer and easier to read. I just used the desk lamp and shined it on the paper from the side. This definitely made the text at the front bolder and more defined.. but the important information at the back doesn't stand out at all. 


Then I tried moving the lamp about to have the light coming in from different angles, but didn't get much from it. However, while looking through my photos with Jenni, she pointed this one out as one of the ones she liked the most.. thinking it would make a nice poster as a hole, with the light and things on my desk too. I really like it too, although I think it would look better without the blank white piece up the back. Also, this poster has to be portrait, not landscape, but I could photograph it again and set it up like this, but take the photo portrait? 


I didn't really feel like I was getting anything really good that I could use, so I thought I'd pack things away and try again the next day, as by this time it was ridiculous o'clock in the morning... But as I lifted up the sheet to move it out of the way, I saw it from this angle.. and thought 'Ooooo'... snap!


The flash made it quite hard to read, but I thought that still looked quite good. I took it without flash too, and got this! I really like how all the type stands out so much! With the shadow behind the cut outs.. this was because I was holding the other plain sheet behind it...
THEN I had an epiphany! I realised that it was the angle that was quite hard to photograph, and it would be easier and even look better... if I stuck it on my wall!!


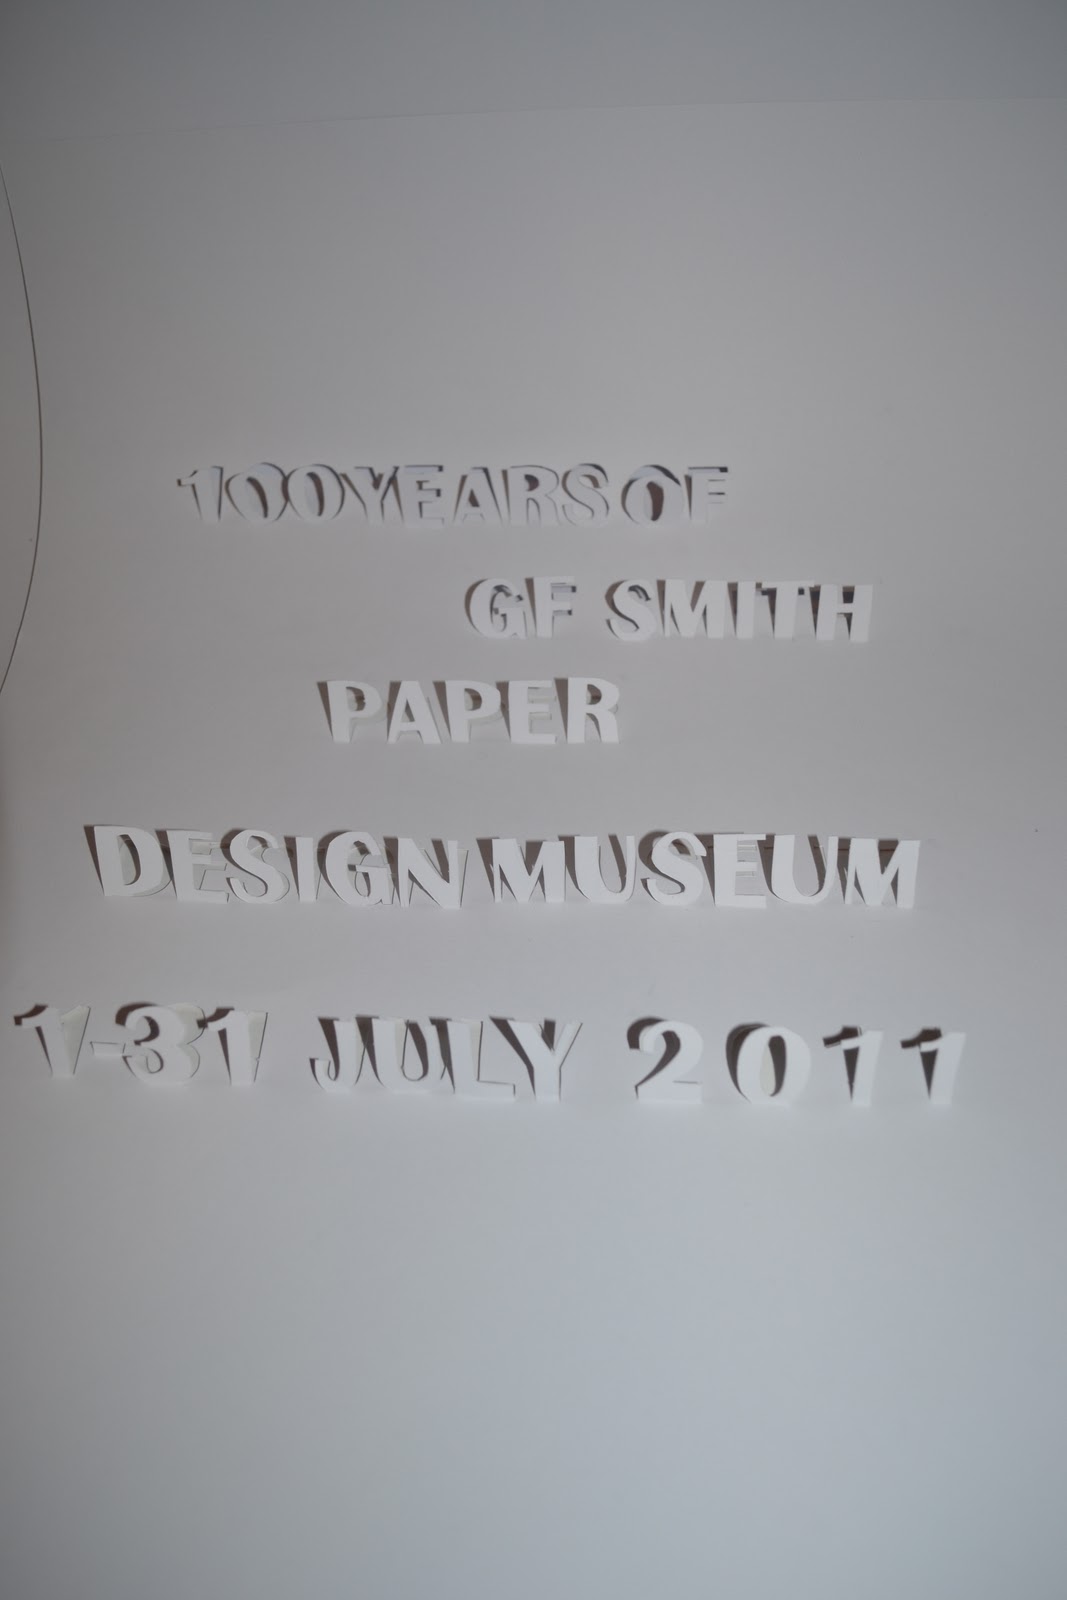
I could tell straight away that it looked better! All the type is readable and quite defined, and I even quite like how you can see my other posters behind and around it, as it gives it the feel of being an actual poster stuck up among others, because really, that's what it is here.


I tried getting slightly higher than it too, to take photos from above looking down a bit, as well as below looking up. These are the original photos, which I am now going to play about with on photoshop to crop them and lighten if needed ect..


I also tried angles like side on, to see if you could still read the type just as well.. which I found out you can't really. Although that can give a nice quality to some things, not quite being able to see it without looking hard, I think for the purpose of this poster, it is not best. This poster is being designed to tell people about the exhibition at the Design Museum, so I think the information should be clear.


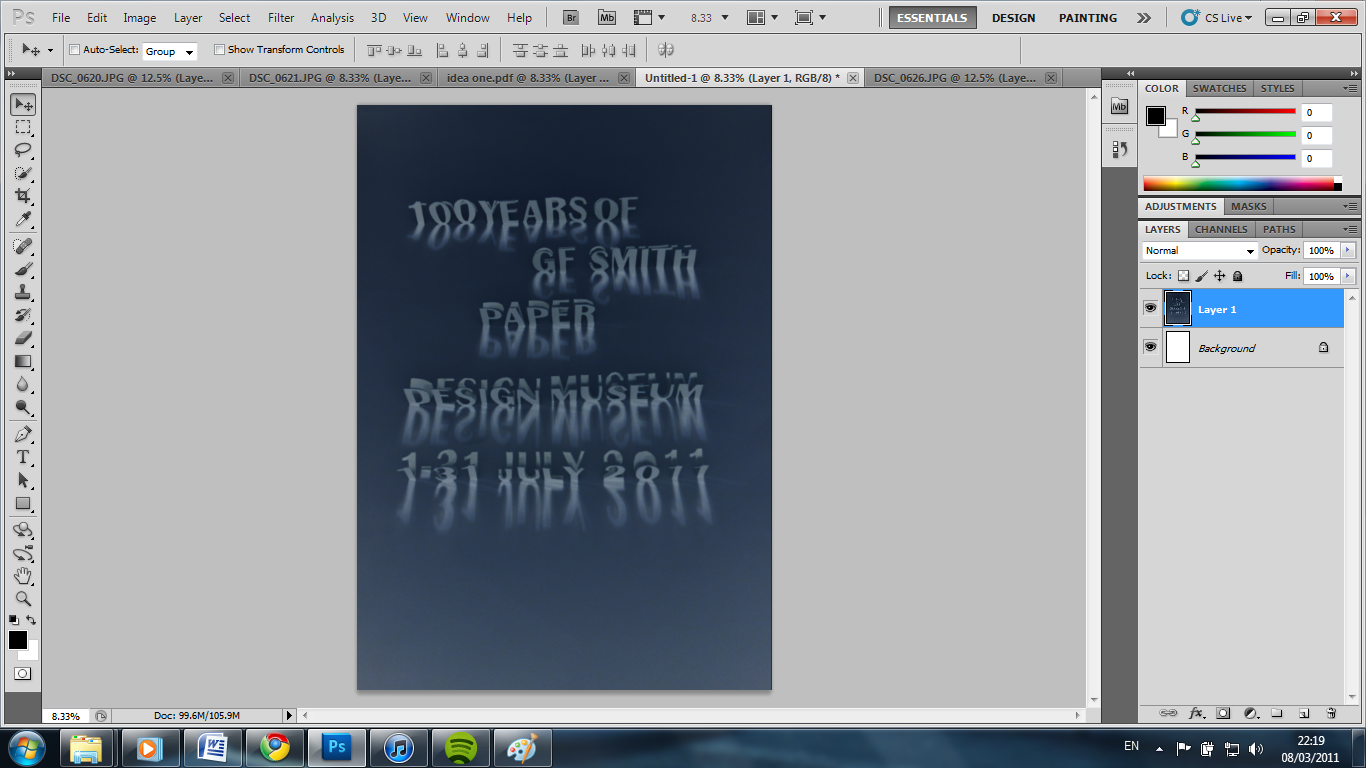
This is the last photo that I took. I managed to get it at a perfect angle, to cut out all of the edges, and get all the type fitted nicely in the frame! The only problem with this image is the colour of it. This will be because of the lighting in my room, however this is not a problem.. Photoshop to the rescue!